This article is aimed at people who would like to try using the Prototype kit but are unsure how to do that. You might need a bit of help if you have never used a command window or if you are new to HTML or CSS. You can bookmark this link to W3Schools in that case for HTML and CSS or this link for basic commands.
If you work for the government, there are trainings available. If you don’t, there is a lot of help online and you will probably want to customise the kit, so this is why I’ve written this blog post. You can also check this online help.
At the end, you will have a live clickable prototype, responsive (= working on both mobile and bigger screens), accessible (unless you modified the components or didn’t used them well).
Edit 19/12/22: Since I wrote this, the prototype kit has evolved quite a lot. Advice in this blog post won’t be as useful as it was at the time of writing. The folder structure is different for example.
The work described here was to create a website for East Renfrewshire Council to support classes to improve digital skills. This needed some customisation. I’ve recently updated it so you could look at the code on Github to see how it’s done with the most recent version of the prototype kit.
Note: This installation is not my first one, and I’m using a Mac. You should only use this for prototypes, not for production code.
In this post:
- installation of the kit
- start a new repository on Github
- customise the prototype
- deploy to Heroku
- some examples
Installation of the kit
If you are ok with using Git then follow the bullet points below. If not, check the instructions from GOV.UK Design System starting at the begin.
- download the prototype kit here.
- Unzip and rename to whatever suits you. Open a command window for that folder.
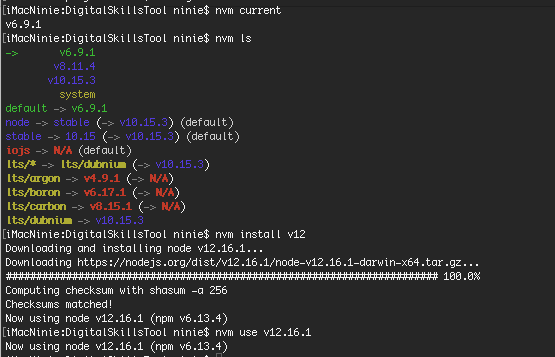
- the latest kit at the time of writing (25/02/20) requires Node.js 12
If you have Node version problems or if you are unsure about having NodeJs at all
This page will help you. If you have nvm installed on your machine, you can check what version you have:
nvm current to see version used with nvm (nvm deals with multiple node versions on one machine).nvm ls to see the various versions you have on the machine.nvm install v12 to have the latest version of node installed.
then you can decide which one you want to use on the computer as the default:nvm use v12.16.1 (for me).
Then npm install and npm start
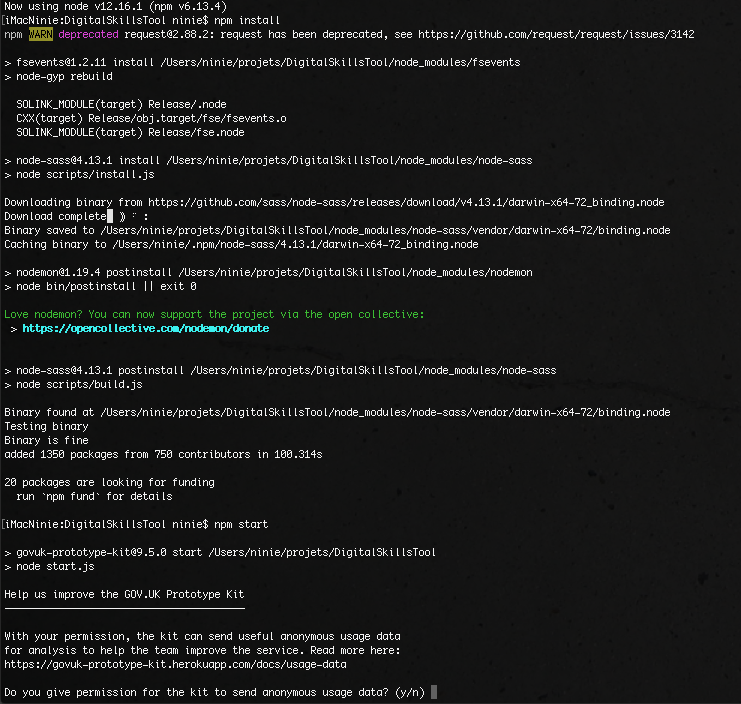
Do you give permission for the kit to send anonymous usage data? (y/n)
It’s up to you. I answered yes.
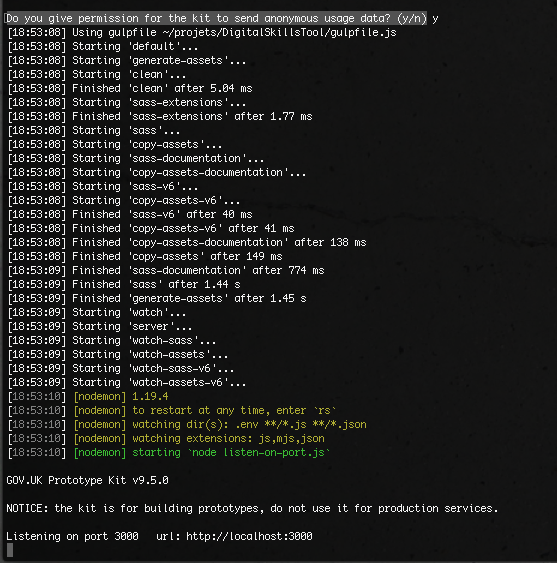
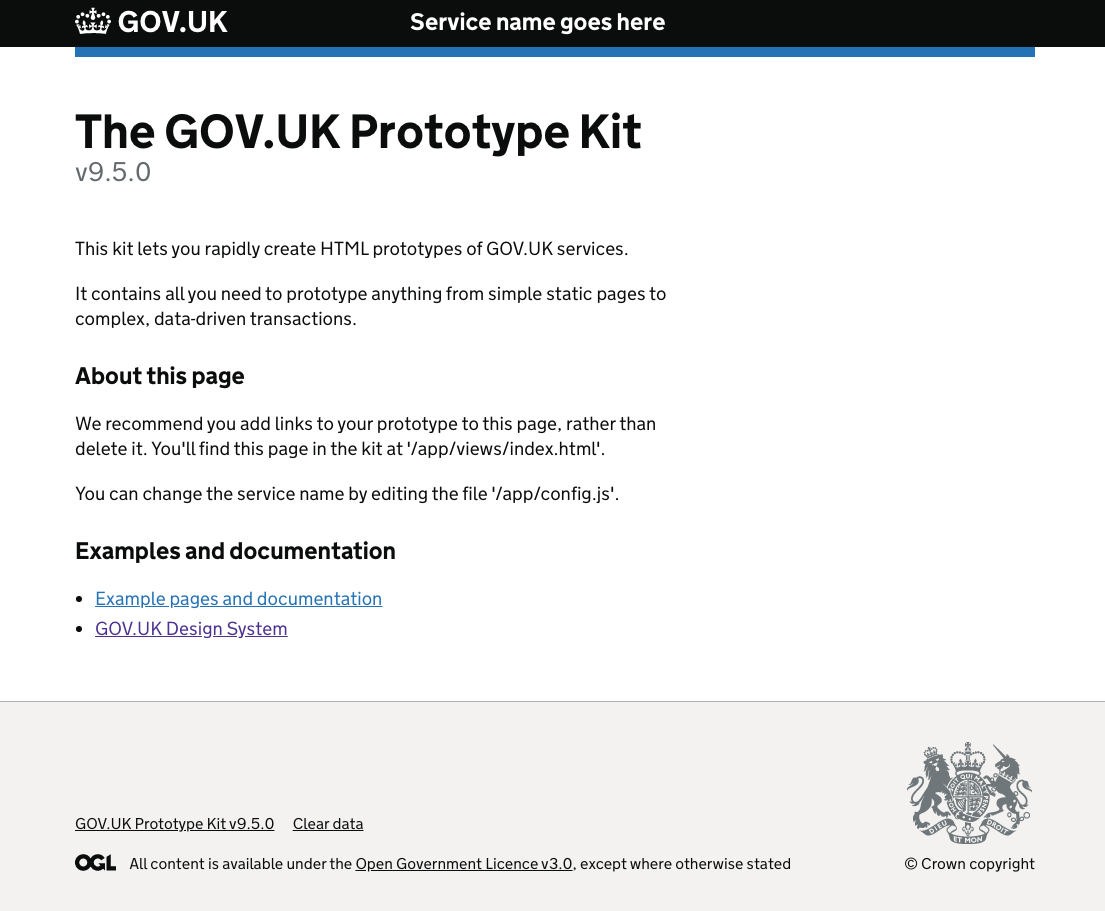
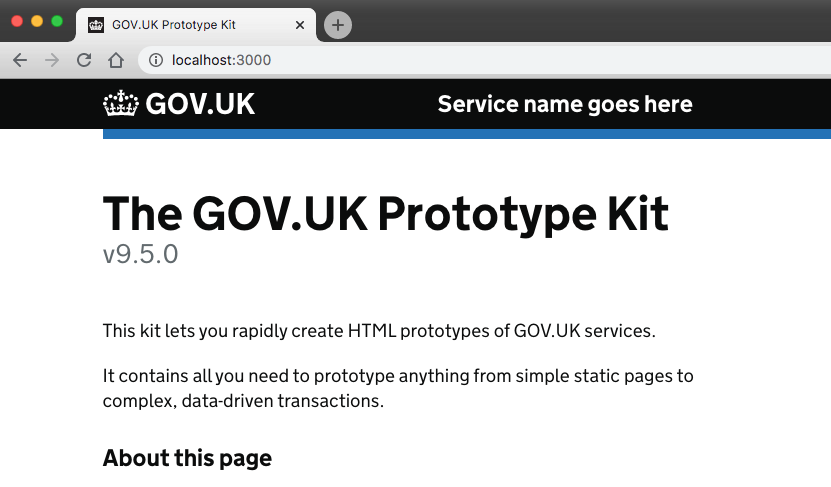
Go to localhost:3000 in your browser, and That’s it …. it’s that easy.
Now start a new repository on Github
If you are not familiar with Github, try this guide first: Hello World
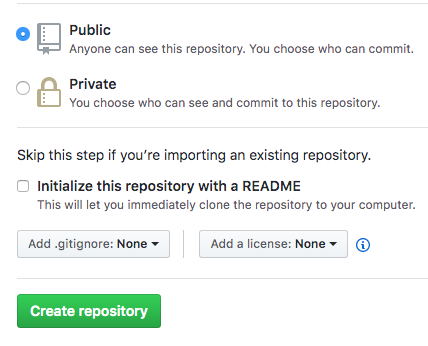
In Github create a new repository
I chose to leave it public, no licence, no gitignore (there is one already), no readme yet.
You will then see the quick setup help from Github:
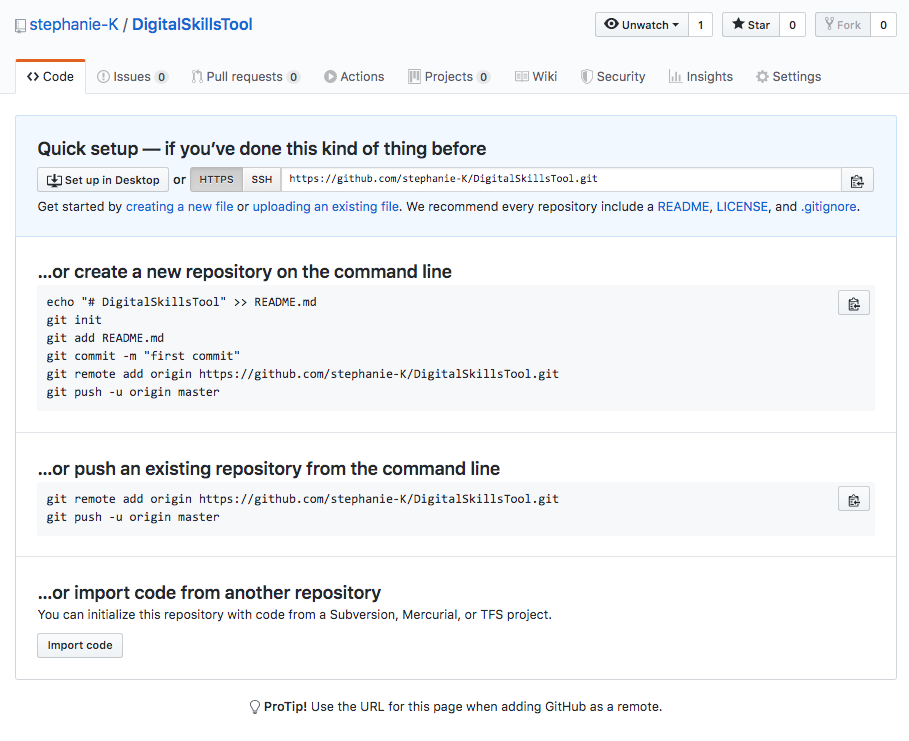
In a Command line window, navigate to your folder
and add the instructions from Github in the picture above (I used ..or create a new repository on the command line, but then also did: git add . then git commit -m "first commit" and finally git push)
Once you’re done, your repository in Github should look like that:
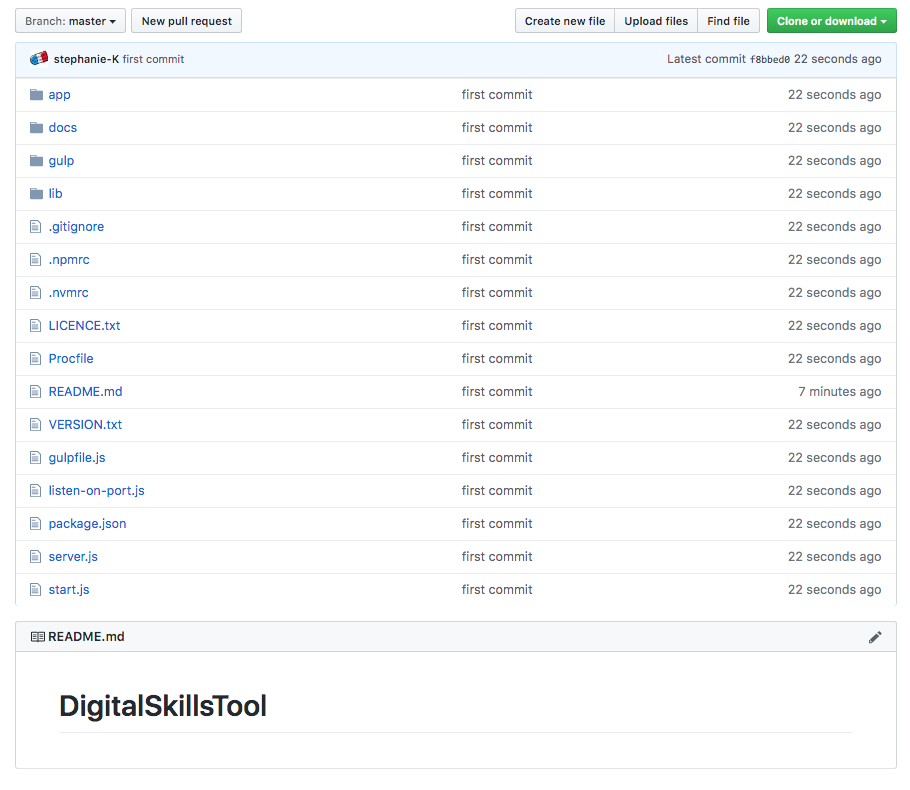
That’s your code ready for version control in Github
Customise the prototype
Create your own layout file
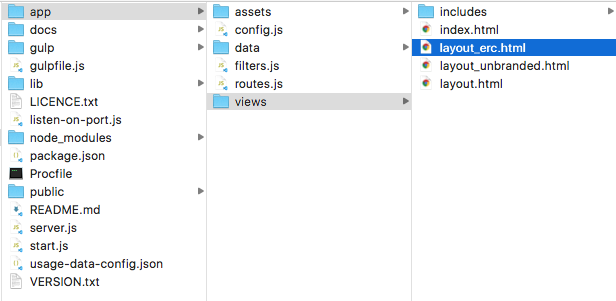
You are going to create your own layout. The kit has an unbranded one. Make a copy of it and change its name. I’ve called mine layout_erc.html
It’s in app>views>layout_unbranded.html
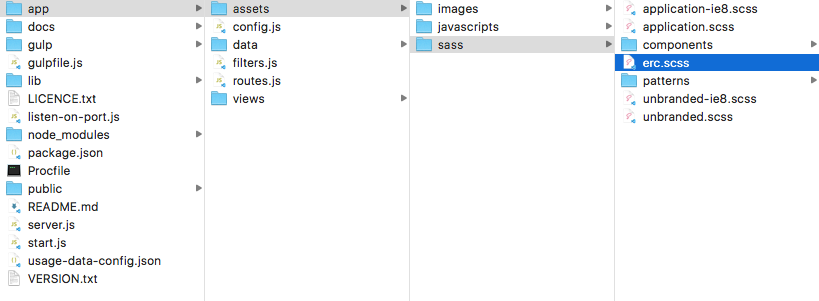
Create your own CSS
Just the same way, you are going to create your own CSS. The kit has an unbranded file. Make a copy of it and change its name. I’ve called mine erc.scss
It’s in app>assets>sass>unbranded.scss
You might want to check that link for advice on changing colours and fonts. (thanks to Joe Lanman for the link)
Add your favicon
If you plan to change the favicon, add yours to app>assets>images (this is the little image in the corner of your tab in a desktop browser)
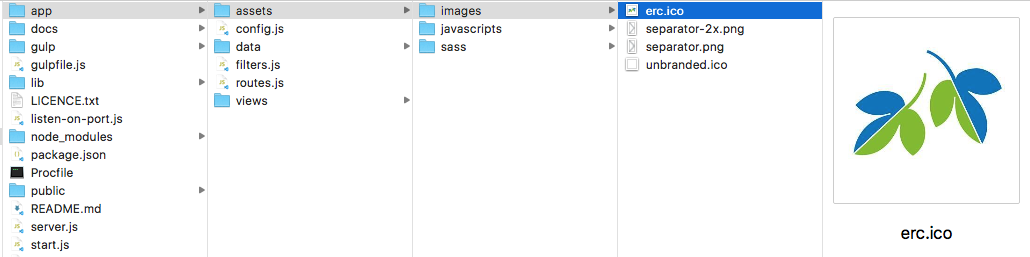
This is where you would put any images you might need as well.
Now add these changes to your own layout
In your layout file, mention your new favicon and your own css file:
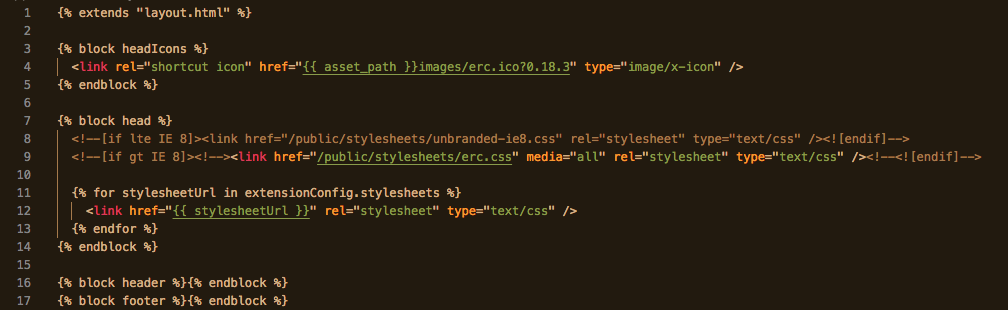
This is also where you will change the footer and header, which at the moment are just emply. But we’ll come back to this later.
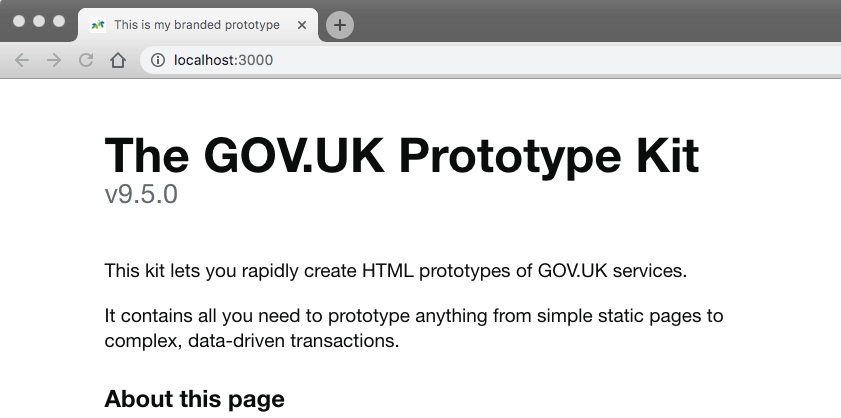
Change your index file to see the changes
In the index.html file (in app>views>index.html) change line 2 by writing your own layout file name and the page title line 5.
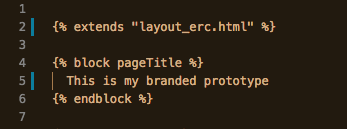
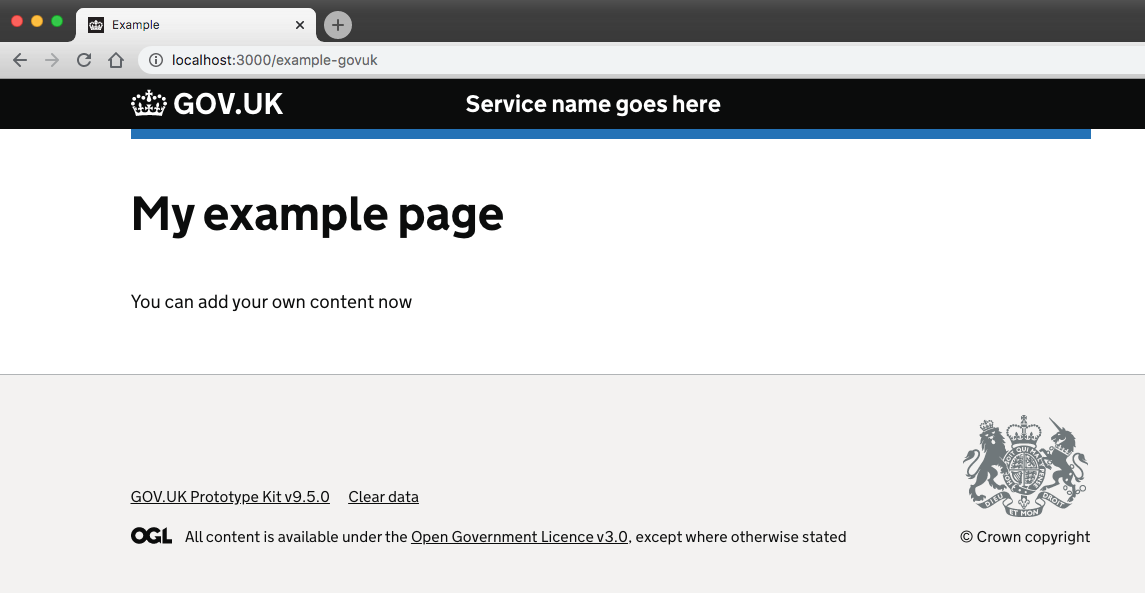
As soon as you save your changes you should see the tab for localhost:3000 updating with your new title and favicon:
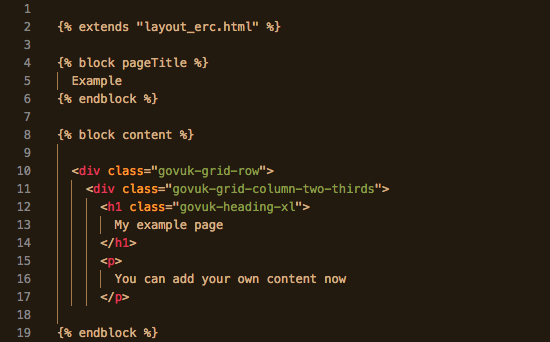
Now you can also make the rest of this page your own by changing the HTML in the block Content (from line 8)
You can add pages in the Views folder. Here is an example of a simple page:
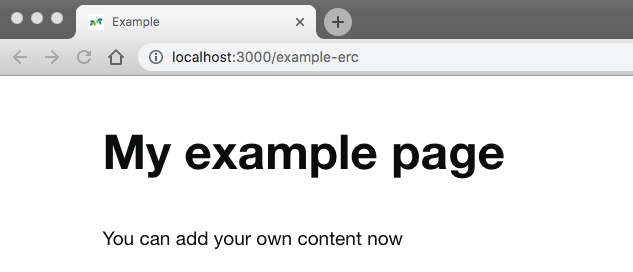
If you use that same code, but changing the layout on line 2 to: layout.html, then your page will have the same text but have the GOVUK branding instead:
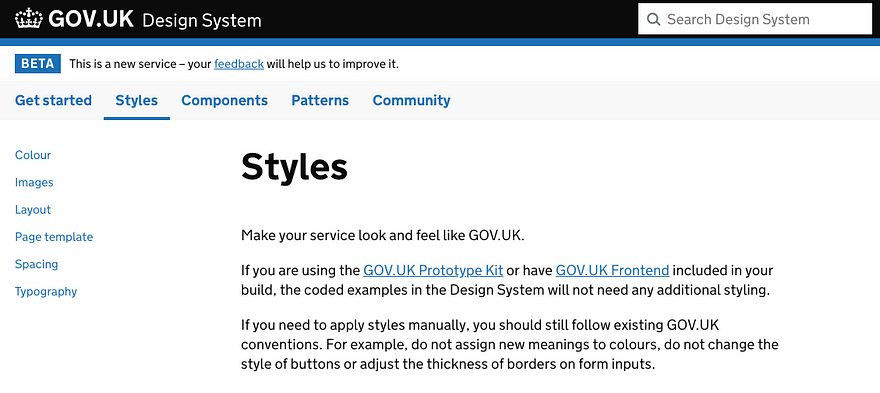
Get help if you are not familiar with the GOV.UK Design System
You’ll find the classes names and more in under ‘Styles’
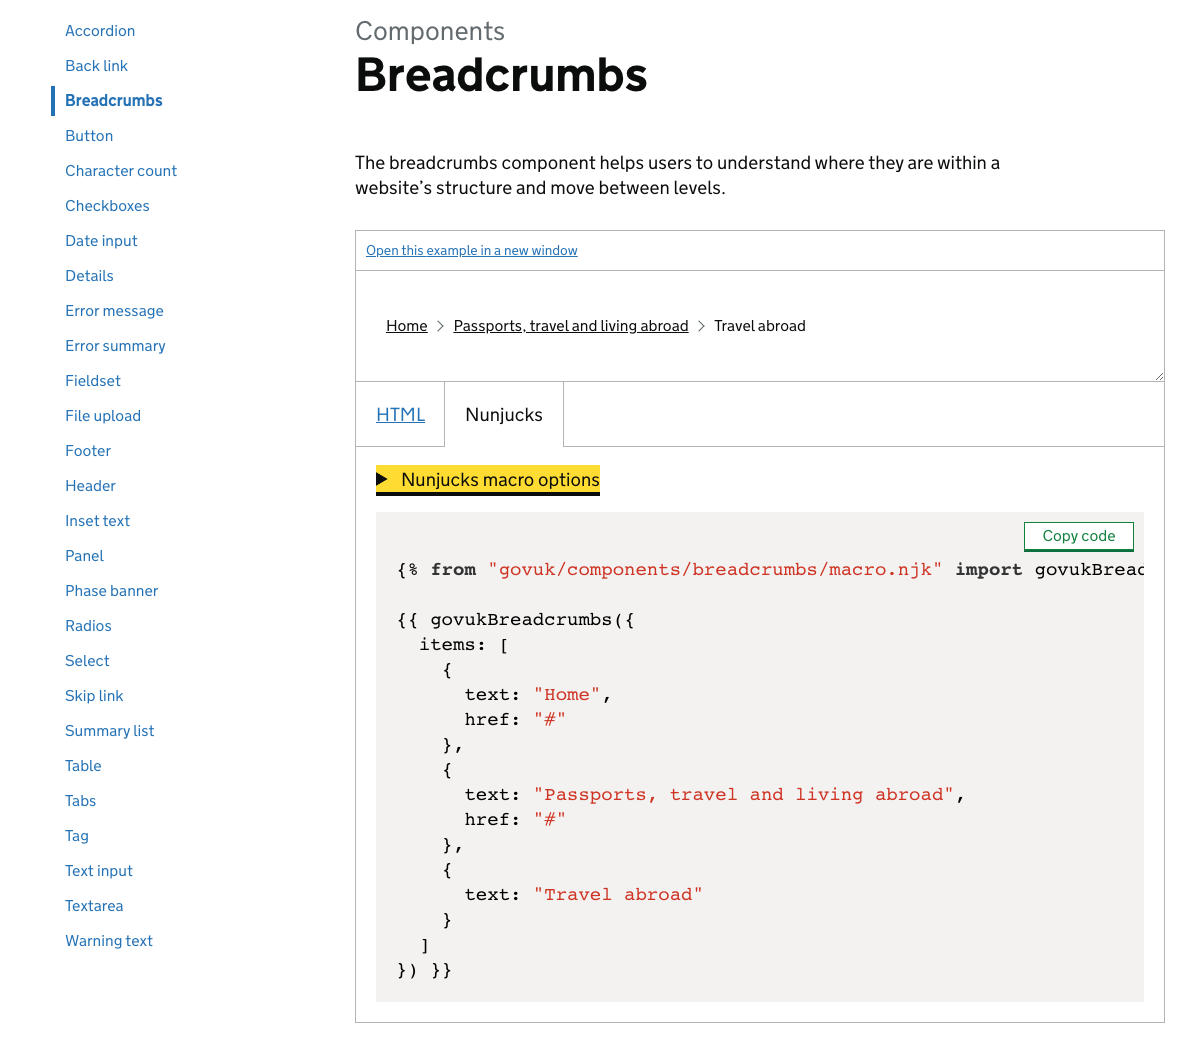
The menu Components and Patterns will also show you what is available.
To build the code of your page, you can simply look for the components you need and then copy the code from there. You can use the Nunjucks version (it’s a templating language which should be easier for non coder as it’s closer to natural language. Or you can use the HTML version for it which will probably suits you best if you know how to code as you can modify things more easily.
You can link one page to the next by a simple ‘Continue’ button component and adding an ‘href’ link to your next page.
If you want to pass some input values or do some validation / logic with them, then you will need to add form tags <form class="form" method="post"> ... your inputs ... </form> and add some code to a key file: route.js
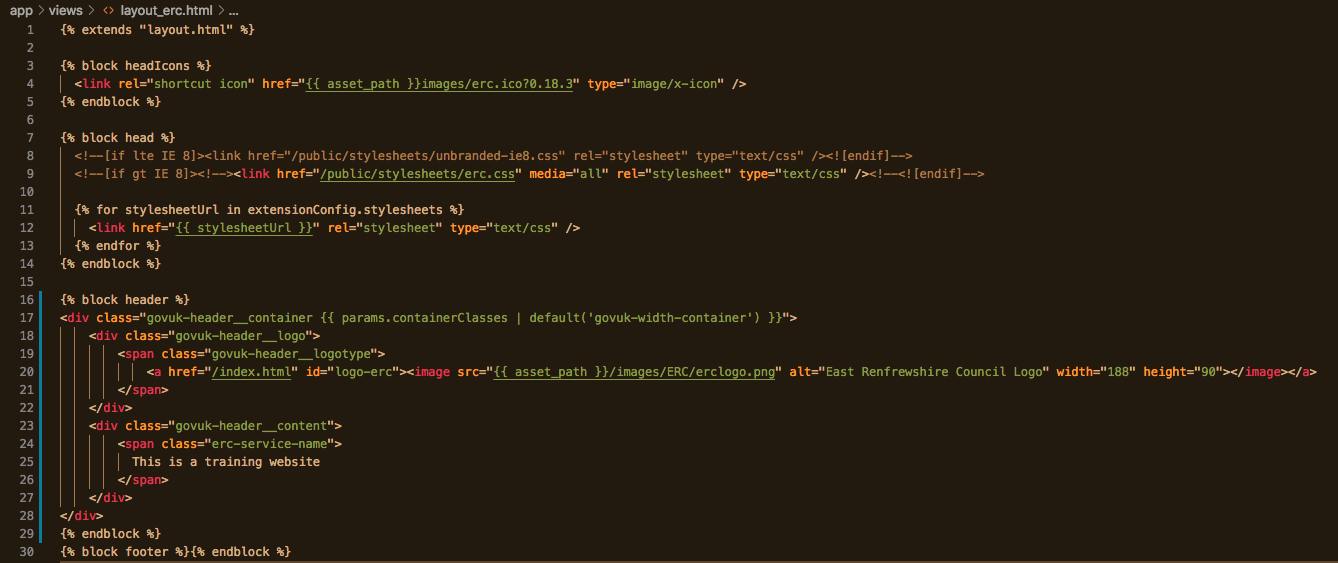
Changing the Header
You will need to add some code in your layout file
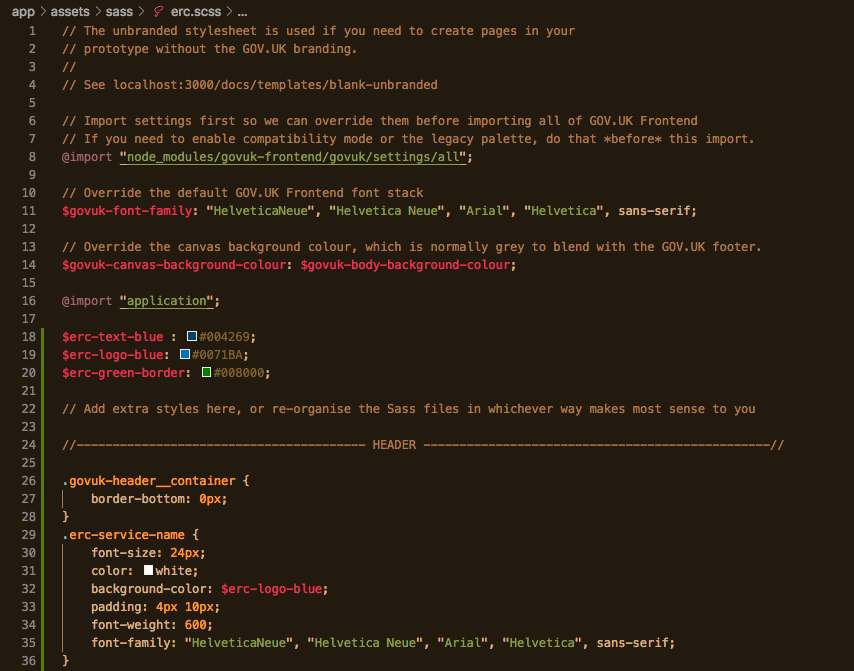
And some CSS for it in your customised SASS file:
Just start under the code that is already in that file. I’ve added a list of my own colour variables, and a bit of style for the header
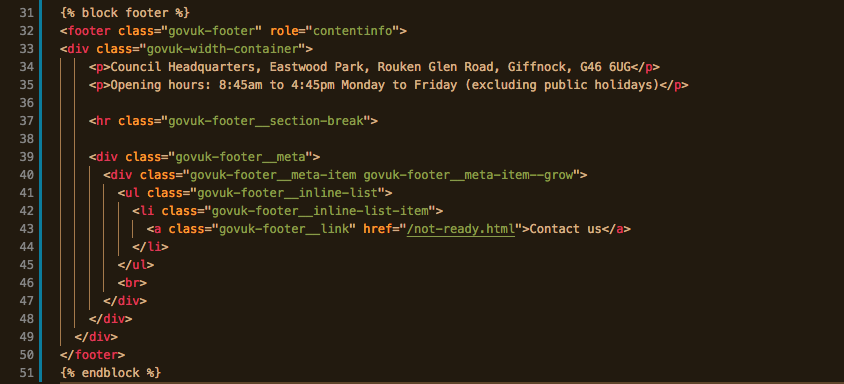
Changing the Footer
You can add some code in the footer block of your customised layout:
Some CSS in your customised Sass file:

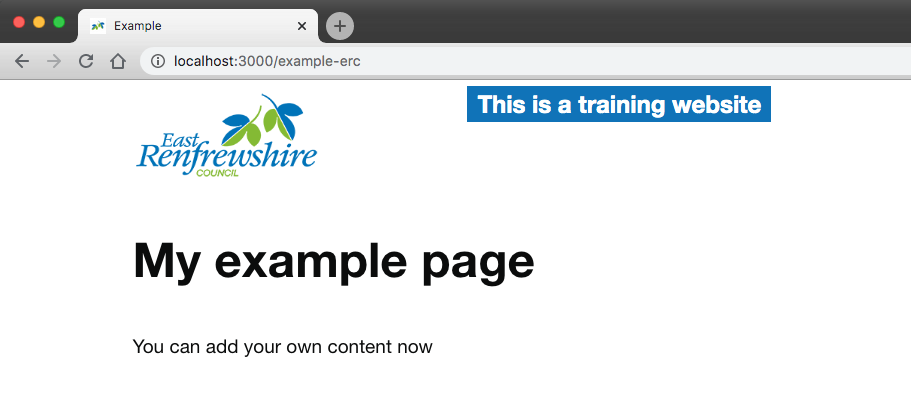
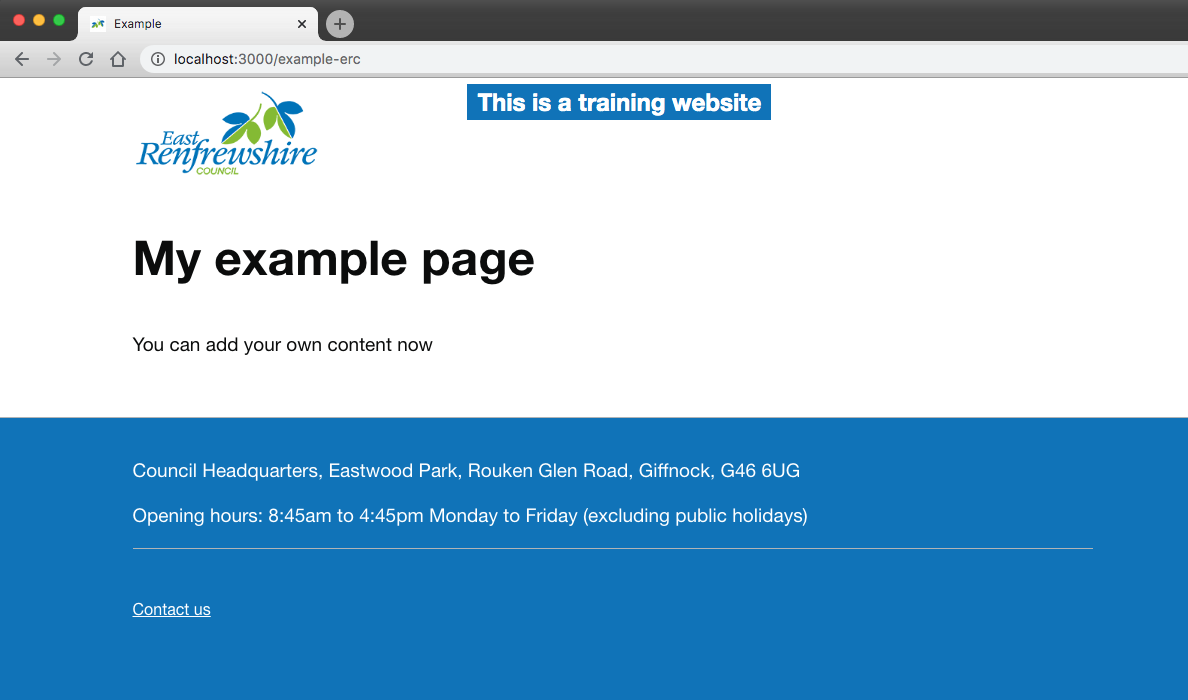
Here is how my example page looks now:
Deploy to Heroku
Edit 01/12/22: Heroku is not longer free, check the recommendations from the GDS (Government Digital Service).
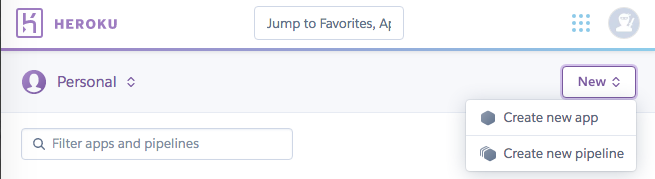
Once you have created an account, you need to create a new app:
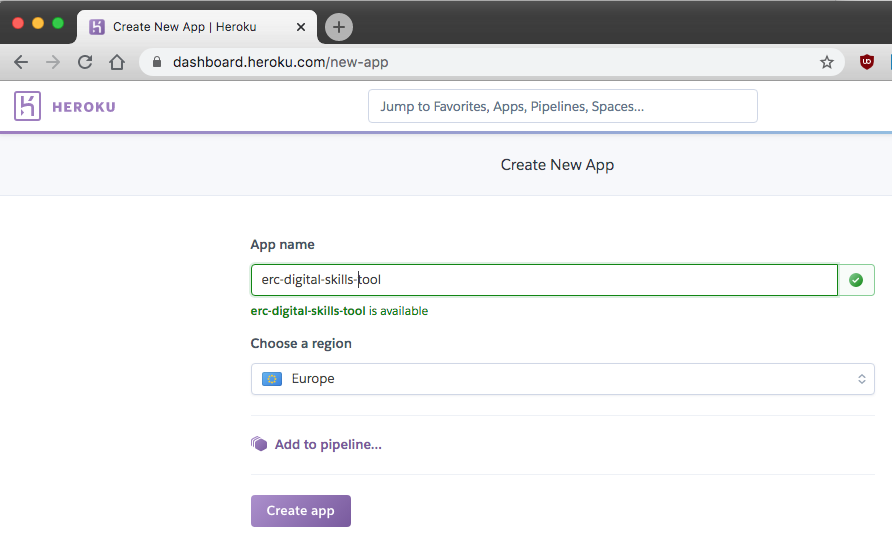
You will then select a name for it, and select the zone for hosting (US or Europe)
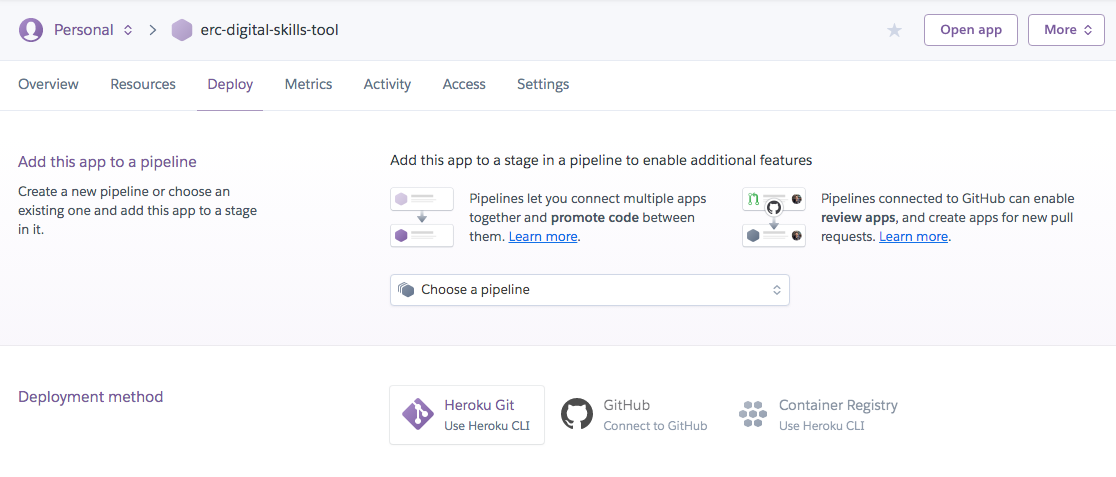
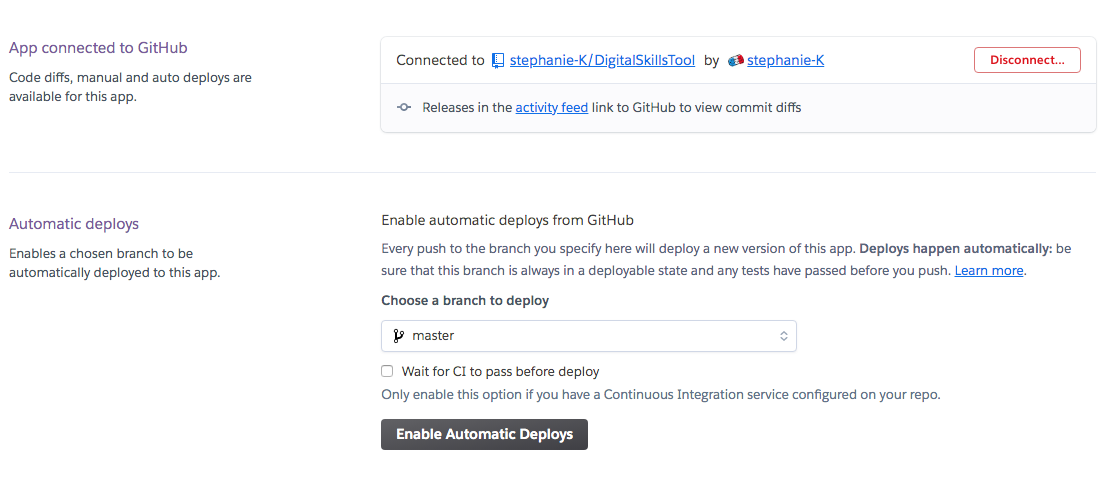
For the deployment method, select Github.
Find your repository by typing its name and then hit Connect.

This is you all set, and every time you will push to master it will automatically deploy to your website if you select: Enable Automatic Deploys
(Note: ‘master’ is now called ‘main’ on Github so this is what you’re likely to see when you do it)
You need to do a manual deployment first though.
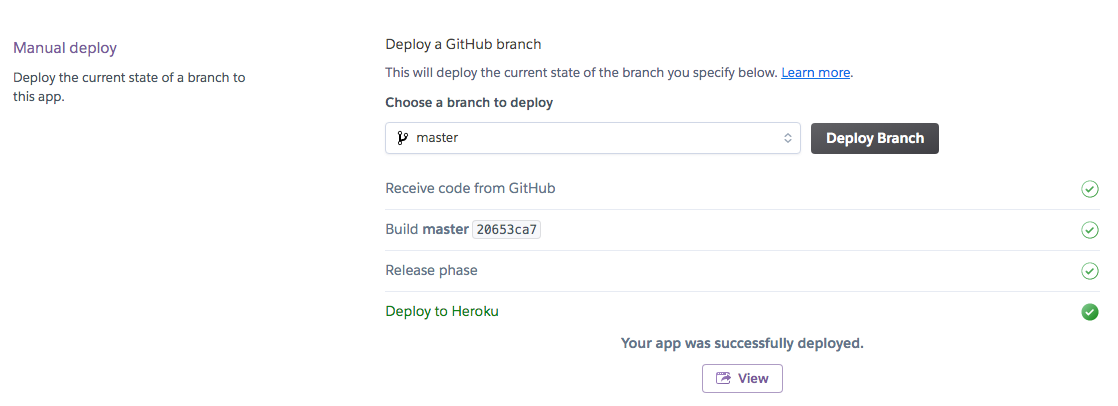
But when you view it, you’ll see there is an error. This is because prototypes made with the kit require a username and password when published online. This stops members of the public coming across your prototype by accident thinking it’s a ‘real’ government website.
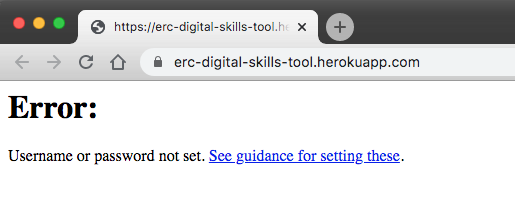
To do that, in a command line window type:
heroku config:set USERNAME=the-username-you-chose --app name-of-your-heroku-app
heroku config:set PASSWORD=the-password-you-chose --app name-of-your-heroku-app
Now when you try to view your app (no need to deploy again) you’ll be prompted to type the user name and password.

That’s it … you should now be able to see your website.
Whenever you push to your master branch in Github, it might take up to 5 minutes to see the changes deployed. Be patient.
If you run into problems with Heroku
It wasn’t the first time I used Heroku, and it took me less than 5 min to create the app, connect to Github and deploy successfully (mostly because I was taking screenshots and taking notes here!)
Previously I had various problems, so writing some useful commands for the command line here:
- to install Heroku
brew install heroku/brew/heroku - my Ruby version wasn’t up to date
brew install ruby heroku login- to see the logs
heroku logs --tail --app name-of-your-heroku-app